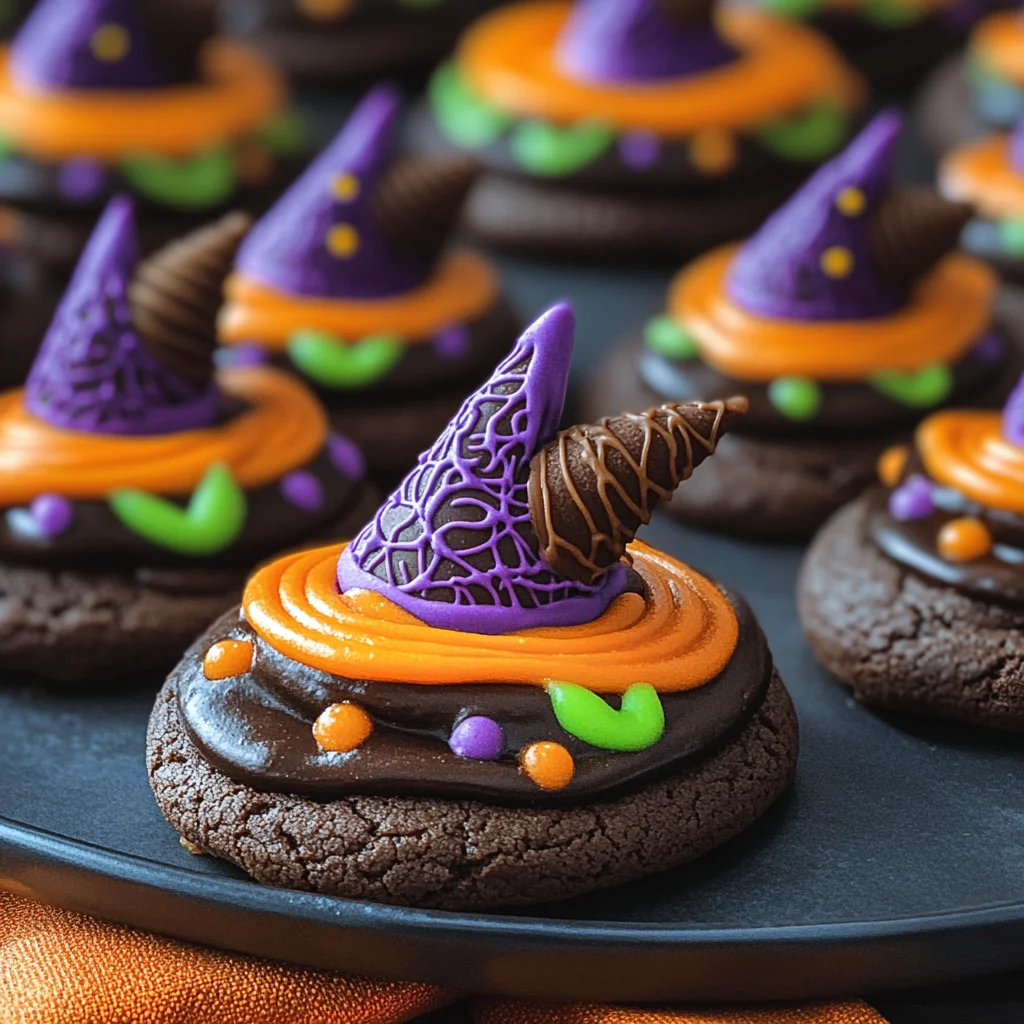
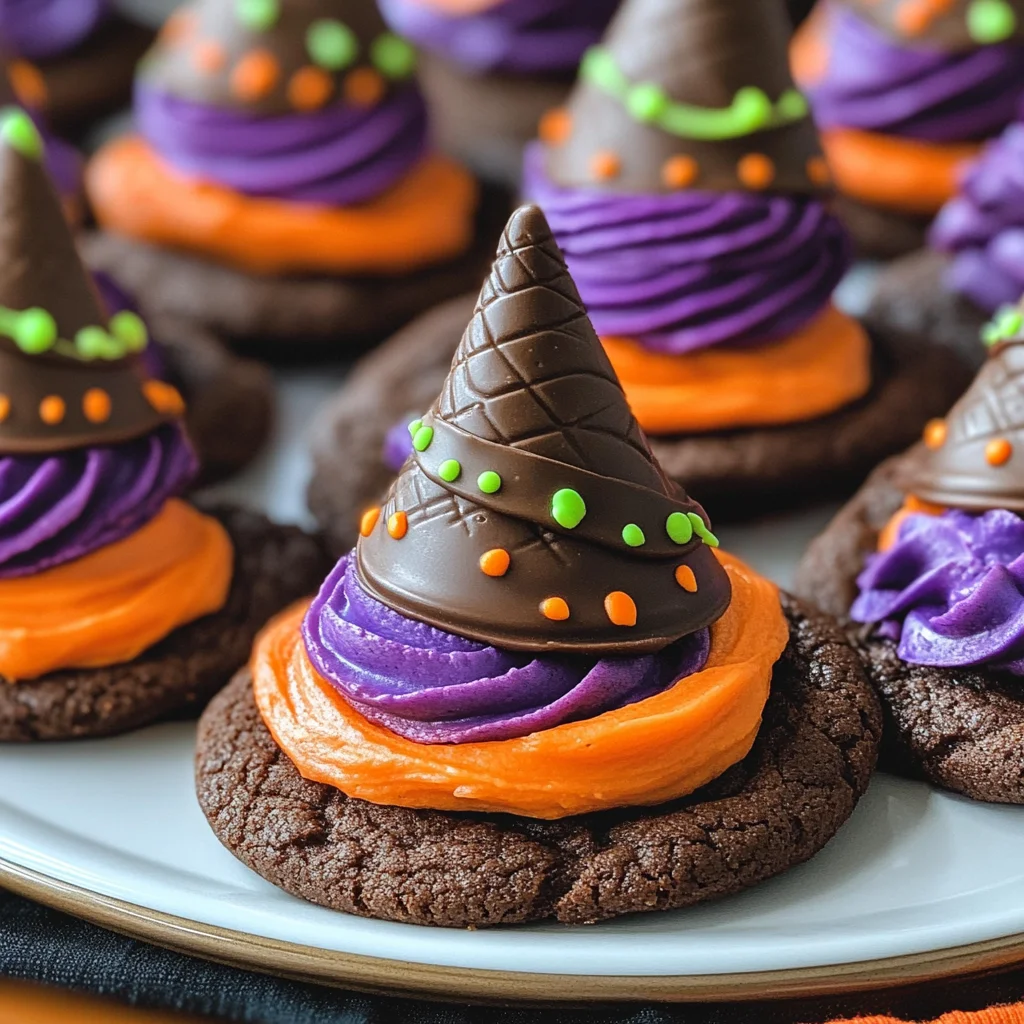
Halloween Witch Hat Cookies
These Halloween Witch Hat Cookies are a delightful and spooky treat that will enchant your guests at any Halloween gathering. Perfect for kids and adults alike, these cookies combine a fun baking project with the thrill of crafting whimsical treats. Their chocolaty goodness and creative designs make them a standout dessert that is sure to impress ghouls and goblins at your next Halloween party.
Why You’ll Love This Recipe
- Fun for Everyone: Baking these cookies is a great activity for families, allowing kids to get creative with decorating.
- Customizable Designs: You can easily switch up colors and decorations, making each cookie uniquely yours.
- Deliciously Decadent: The chocolate flavor combined with vibrant icing creates a treat that’s both visually appealing and tasty.
- Perfect for Parties: These cookies are excellent for Halloween parties, school events, or themed gatherings, adding festive flair to your dessert table.
Tools and Preparation
Before diving into this recipe, gather the necessary tools to ensure a smooth baking process. Having everything ready makes the cooking experience more enjoyable.
Essential Tools and Equipment
- Cupcake Cones Baking Rack
- Cookie Sheet
- Parchment Paper
- Decorating Bags
- Icing Tips (2B and 3)
Importance of Each Tool
- Cupcake Cones Baking Rack: This tool allows you to bake the sugar cones upright, ensuring even cooking.
- Decorating Bags: Perfect for piping icing neatly onto your cookies, giving them a professional finish.
- Icing Tips (2B and 3): These tips help create different designs with the icing, enhancing the overall look of your witch hats.
Ingredients
To make these enchanting Halloween Witch Hat Cookies, you will need the following ingredients:
For the Cake and Cookies
- Favorite Cake Mix or Try Wilton’s Chocolate Cake Recipe
- Store Bought Chocolate Cookies or Try This Recipe from Wilton
For the Icing Colors
- Lemon Yellow Icing Color
- Black Color Mist Food Coloring Spray
- Rose Icing Colors Pink Food Coloring
- Violet Icing Color, Gel Food Coloring
- Golden Yellow Icing Color
- Orange Icing Color
For Assembly
- Sugar Cones
- Creamy White Decorator Icing, 4 lb. Tub
How to Make Halloween Witch Hat Cookies
Step 1: Prepare & Bake the Cones
- Prepare the cake mix according to the chosen recipe instructions.
- Place the Cupcake Cones Baking Rack on a cookie sheet.
- Insert sugar cones into the rack and fill each cone with about 2 tablespoons of cake batter.
- Bake and cool the cones as per your recipe’s timing instructions.
Step 2: Spray the Cones
- If needed, trim any risen cake at the top of each cone using a knife.
- Place the cones wide side down on parchment paper.
- Using Black Color Mist, spray each cone black and let them dry for about 10 to 15 minutes.
Step 3: Tint the Icing & Prepare the Bags
- Tint 1 cup of creamy white decorator icing orange.
- Combine violet and rose icing colors to tint another cup of creamy white decorator icing purple.
- Prepare two decorating bags with tip 2B; fill one with orange icing and one with purple icing.
- Tint ¼ cup of creamy white decorator icing yellow by mixing golden yellow and lemon yellow colors; place it in a bag with tip 3 attached.
Step 4: Assemble the Witch Hats
- Pipe a small amount of orange icing in the center of each chocolate cookie; then place a cone on top.
- With tip facing out, pipe a band around the wide end of half the cones using orange icing; smooth with a spatula.
- Repeat this step using purple icing on the other half of cookies and cones.
- Allow them to set for about 15 to 20 minutes.
- Finally, use yellow tinted icing (tip 3) to pipe a buckle around each hat band.
- Let them set for another 15 to 20 minutes before enjoying!
With these detailed steps, you’ll create stunning Halloween Witch Hat Cookies that are just as delightful to make as they are to eat! Enjoy this festive treat at your next celebration!
How to Serve Halloween Witch Hat Cookies
These Halloween Witch Hat Cookies are a delightful treat that can be enjoyed in various fun ways. Whether at a Halloween party or as a festive dessert at home, these cookies will surely impress everyone.
With Themed Drinks
- Spooky Punch: Pair your cookies with a spooky punch made from fruit juices and soda for a refreshing and festive drink.
- Hot Chocolate: Serve alongside rich hot chocolate topped with whipped cream for cozy indulgence.
On a Dessert Table
- Colorful Display: Arrange the cookies on a vibrant platter surrounded by other themed treats like spider cupcakes and ghost marshmallows.
- Witch Hat Cookie Stands: Use decorative stands to elevate your witch hat cookies, making them the star of the dessert table.
As Party Favors
- Gift Bags: Package individual cookies in clear bags tied with orange or purple ribbons for guests to take home.
- Themed Boxes: Create small boxes decorated with Halloween designs filled with cookies for a delightful surprise.
How to Perfect Halloween Witch Hat Cookies
To make your Halloween Witch Hat Cookies even more impressive, consider these helpful tips.
- Bold Color Application: Ensure even spraying of the cones for a consistent black color. This helps create an authentic witch hat appearance.
- Icing Consistency: Make sure your icing is the right consistency. It should be thick enough to hold its shape but thin enough to pipe smoothly.
- Cone Placement: Securely place the sugar cones into the cookies so they don’t topple over during serving.
- Creative Toppings: Experiment with additional edible decorations like sprinkles or candy eyes to add even more character to your cookies.
Best Side Dishes for Halloween Witch Hat Cookies
Complement your Halloween Witch Hat Cookies with these delicious side dishes that will enhance your festive spread.
- Pumpkin Soup: A warm, creamy soup that brings the flavors of fall, perfect for warming up on chilly nights.
- Crispy Veggie Platter: A colorful assortment of fresh vegetables served with a tangy dip—an ideal contrast to sweet treats.
- Cheese and Crackers: An elegant cheese board featuring assorted cheeses and crunchy crackers pairs well with sweet flavors.
- Mini Quiches: Bite-sized quiches filled with seasonal vegetables add savory balance alongside the sweetness of cookies.
- Applesauce Cups: Sweet and smooth applesauce is a refreshing palate cleanser that children enjoy.
- Caramel Popcorn: A crunchy, sweet snack that adds an exciting texture alongside soft cookies, making it perfect for any gathering.
Common Mistakes to Avoid
Here are some common pitfalls when making Halloween Witch Hat Cookies and how to steer clear of them.
- Boldly measure your ingredients: Not measuring correctly can lead to inconsistent texture or flavor. Always use precise measurements for accurate results.
- Boldly choose the right baking time: Overbaking or underbaking can ruin your cookies. Keep an eye on them and follow the recommended baking times closely.
- Boldly cool your cones properly: Skipping the cooling step can result in melted icing or a messy assembly. Allow your baked cones to cool completely before decorating.
- Boldly decorate with care: Rushing through decoration can lead to a less appealing look. Take your time piping icing for a polished finish.
- Boldly store them correctly: Storing improperly can affect freshness. Use airtight containers to keep your cookies moist.
Storage & Reheating Instructions
Refrigerator Storage
- Store cookies in an airtight container.
- They will stay fresh for up to 5 days in the refrigerator.
Freezing Halloween Witch Hat Cookies
- Wrap cookies tightly in plastic wrap.
- Place them in a freezer-safe container; they can be frozen for up to 3 months.
Reheating Halloween Witch Hat Cookies
- Oven: Preheat oven to 350°F (175°C), place cookies on a baking sheet for about 5 minutes.
- Microwave: Heat individual cookies for 10-15 seconds until just warm.
- Stovetop: Place a cookie in a pan over low heat for about 1-2 minutes, flipping it halfway.
Frequently Asked Questions
If you’re curious about more details regarding Halloween Witch Hat Cookies, check out these FAQs.
What are Halloween Witch Hat Cookies?
Halloween Witch Hat Cookies are fun, festive treats made by decorating chocolate cookies with cake cone hats, perfect for Halloween parties.
How long does it take to make Halloween Witch Hat Cookies?
The total time is approximately 105 minutes, which includes preparation and baking time.
Can I customize my Halloween Witch Hat Cookies?
Absolutely! You can use different icing colors and flavors to make them unique and personal.
How should I store leftover Halloween Witch Hat Cookies?
Store them in an airtight container at room temperature or refrigerate them for extended freshness.
Final Thoughts
These Halloween Witch Hat Cookies are not only delightful but also versatile. Perfect for parties, they offer endless customization options that will cater to any taste. Give this recipe a try and impress your friends with these spooky yet delicious treats!
Halloween Witch Hat Cookies
Elevate your Halloween celebrations with these enchanting Halloween Witch Hat Cookies! These whimsical treats combine chocolate cookies and cake cones to create delightful witch hats that are as fun to make as they are to eat. Perfect for parties, school events, or family gatherings, these cookies can be easily customized with vibrant icing colors and creative decorations. Whether you’re crafting them with kids or impressing guests at a spooky soirée, these cookies are bound to become a favorite. Enjoy the chocolaty goodness and festive flair of these charming treats!
- Prep Time: 30 minutes
- Cook Time: 25 minutes
- Total Time: 55 minutes
- Yield: Makes approximately 12 cookies
- Category: Dessert
- Method: Baking
- Cuisine: American
Ingredients
- Favorite Cake Mix or Wilton’s Chocolate Cake Recipe
- Store Bought Chocolate Cookies or Wilton's Cookie Recipe
- Sugar Cones
- Creamy White Decorator Icing (4 lb. tub)
- Food Coloring: Lemon Yellow, Black Color Mist, Rose, Violet, and Golden Yellow
Instructions
- Prepare cake mix according to instructions. Preheat oven and place sugar cones in a Cupcake Cones Baking Rack on a cookie sheet.
- Fill each cone with 2 tablespoons of cake batter and bake as instructed until done. Cool completely.
- Trim any excess cake from the top of the cones and spray them with Black Color Mist; let dry.
- Tint decorator icing in orange, purple, and yellow shades. Fill decorating bags accordingly.
- Assemble cookies by piping icing on chocolate cookies and attaching the cones; decorate with icing bands and buckles.
Nutrition
- Serving Size: 1 cookie (45g)
- Calories: 160
- Sugar: 12g
- Sodium: 80mg
- Fat: 7g
- Saturated Fat: 3g
- Unsaturated Fat: 4g
- Trans Fat: 0g
- Carbohydrates: 23g
- Fiber: 1g
- Protein: 2g
- Cholesterol: 15mg
