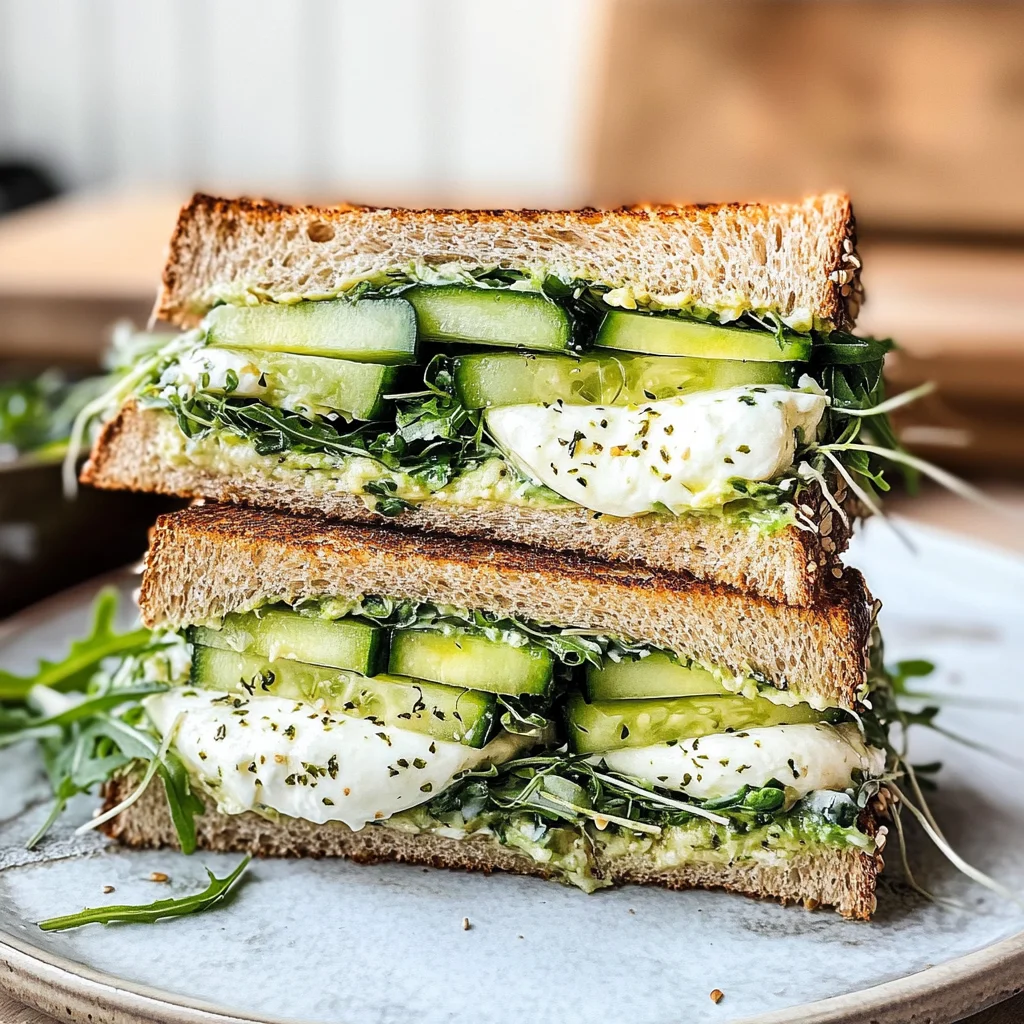
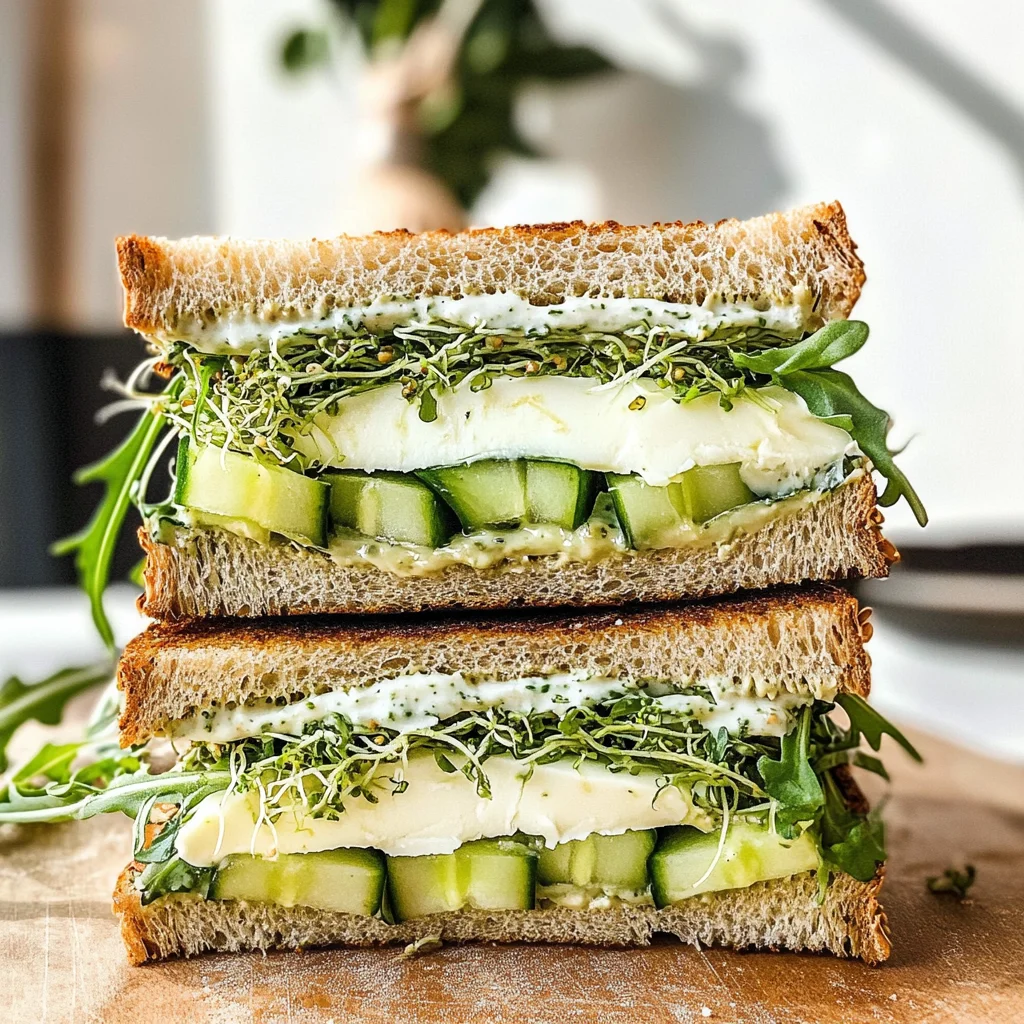
Green Goddess Sandwich
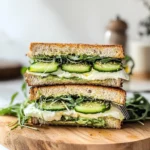
This Green Goddess Sandwich is a delightful and nourishing choice for any meal. Bursting with fresh flavors, this vegetarian delight combines a creamy herb sauce with vibrant veggies, creamy avocado, and mozzarella cheese, all nestled between slices of hearty whole-wheat bread. Perfect for lunches, picnics, or a quick dinner, this sandwich stands out with its unique blend of tastes and textures.
Why You’ll Love This Recipe
- Quick Preparation: With just 10 minutes of prep time, you can whip up this sandwich in no time.
- Flavorful Ingredients: The combination of Greek yogurt, fresh herbs, and zesty lemon juice creates a deliciously creamy sauce that elevates the sandwich.
- Nutrient-Packed: Loaded with fresh vegetables and healthy fats from avocado, this sandwich is both satisfying and nutritious.
- Versatile Option: Whether enjoyed as a lunch or a light dinner, the Green Goddess Sandwich fits various occasions perfectly.
- Customizable: Feel free to add your favorite veggies or switch up the cheese to make it your own.
Tools and Preparation
Before diving into making your Green Goddess Sandwich, gather the necessary tools to streamline the process. Having everything ready will make assembly quick and easy.
Essential Tools and Equipment
- Mixing bowl
- Whisk
- Knife
- Cutting board
- Spatula
Importance of Each Tool
- Mixing bowl: Essential for combining ingredients smoothly to create your flavorful sauce.
- Whisk: Helps achieve the perfect consistency for the yogurt-mayo sauce by blending ingredients thoroughly.
- Knife: Necessary for slicing vegetables and bread evenly for your sandwich.
Ingredients
For the Sauce
- ¼ cup Greek yogurt
- ¼ cup mayonnaise
- 1 clove garlic, grated or pressed
- 3 tablespoons fresh chives, finely chopped
- 3 tablespoons tarragon, finely chopped
- zest and juice of ½ lemon
- 1 tablespoon olive oil
- ¼ teaspoon salt
- ¼ teaspoon ground black pepper
For the Sandwich
- 4 thick slices whole-wheat bread (1/2 inch)
- 1 cup arugula (or watercress)
- 6 ounces fresh mozzarella cheese, sliced ¼ inch thick
- 1/3 English cucumber, thinly sliced
- 1 medium avocado, sliced
- 2/3 cup alfalfa sprouts
How to Make Green Goddess Sandwich
Step 1: Prepare the Sauce
In a small mixing bowl, add the Greek yogurt, mayonnaise, grated garlic, chopped chives, chopped tarragon, lemon zest and juice, olive oil, salt, and pepper. Whisk together until well combined.
Step 2: Assemble the Sandwiches
Spread 2 tablespoons of the yogurt-mayo sauce on each slice of whole-wheat bread.
Step 3: Layer Ingredients
On two slices of bread (sauce side up), layer half of the arugula followed by mozzarella slices, cucumber slices, avocado slices. Top with alfalfa sprouts evenly distributed among both sandwiches.
Step 4: Complete the Sandwiches
Place the remaining two bread slices on top (spread side down) to close the sandwiches.
Step 5: Serve
Cut each sandwich in half diagonally and serve immediately for maximum freshness. Enjoy your vibrant Green Goddess Sandwich!
How to Serve Green Goddess Sandwich
This Green Goddess Sandwich is perfect for a variety of occasions. Whether you enjoy it for lunch, a picnic, or a light dinner, there are endless ways to serve it.
Picnic Perfection
- Pack it up: Wrap each sandwich in parchment paper for easy transport.
- Pair with fruit: Fresh berries or sliced apples add a refreshing touch.
Light Lunch
- Serve with soup: A bowl of tomato or vegetable soup complements the sandwich beautifully.
- Add a salad: A simple green salad with vinaigrette balances the meal.
Quick Dinner
- Top with extras: Add sliced olives or roasted red peppers on the side for added flavor.
- Offer dips: Serve with hummus or a zesty dressing for dipping.
How to Perfect Green Goddess Sandwich
Creating the ultimate Green Goddess Sandwich is all about freshness and balance. Follow these tips for a delicious result every time.
- Use fresh herbs: Opt for freshly chopped chives and tarragon for vibrant flavor.
- Choose quality bread: Whole-wheat bread should be thick and hearty to hold all the fillings.
- Layer wisely: Distribute ingredients evenly to ensure every bite is packed with flavor.
- Customize your veggies: Feel free to swap in your favorite greens or add bell peppers for crunch.
Best Side Dishes for Green Goddess Sandwich
Complement your Green Goddess Sandwich with these delightful side dishes. They enhance the meal while keeping it light and refreshing.
- Crisp Veggie Sticks: Carrot, celery, and bell pepper sticks add crunch and color. Serve with hummus for dipping.
- Fruit Salad: A mix of seasonal fruits offers sweetness that pairs well with the savory sandwich.
- Chilled Gazpacho: This cold soup made from tomatoes and cucumbers is refreshing on warm days.
- Quinoa Salad: Packed with protein, quinoa mixed with herbs and diced vegetables makes an excellent side.
- Sweet Potato Fries: Baked sweet potato fries provide a healthy twist on traditional fries.
- Roasted Chickpeas: Crunchy and flavorful, these can be seasoned to match your sandwich’s taste profile.
Common Mistakes to Avoid
Making a Green Goddess Sandwich can be simple, but there are common mistakes that might affect your final dish. Here are some tips to help you avoid them.
- Skipping the sauce: The creamy herb-packed sauce is essential for flavor. Don’t skip or skimp on it; use the full amount for a delicious sandwich.
- Overstuffing: While it’s tempting to add lots of ingredients, too much filling can make the sandwich hard to handle. Aim for balance so each bite has a taste of everything.
- Using stale bread: Fresh bread provides the best texture and taste. Always use fresh, hearty whole-wheat bread for the best results.
- Ignoring seasoning: Seasoning your sauce properly enhances all flavors in the sandwich. Don’t forget salt and pepper; they elevate the dish significantly.
- Cutting too early: Letting your sandwich sit for a moment allows flavors to meld. If you cut too early, it may fall apart or lose its structure.
Storage & Reheating Instructions
Refrigerator Storage
- Store your assembled sandwiches in an airtight container.
- They are best consumed within 1-2 days for optimal freshness.
Freezing Green Goddess Sandwich
- It’s recommended to freeze only the components separately to maintain quality.
- Use freezer-safe bags or containers to prevent freezer burn.
Reheating Green Goddess Sandwich
- Oven: Preheat to 350°F (175°C) and heat wrapped in foil for about 10-15 minutes until warm.
- Microwave: Place on a microwave-safe plate and heat for 30-60 seconds, checking often to avoid sogginess.
- Stovetop: Heat in a skillet over medium heat for about 3-4 minutes per side until warmed through.
Frequently Asked Questions
What is a Green Goddess Sandwich?
A Green Goddess Sandwich features fresh veggies, creamy avocado, mozzarella cheese, and a flavorful herbed sauce all between slices of whole-wheat bread.
How can I customize my Green Goddess Sandwich?
Feel free to add other veggies like bell peppers or sprouts, swap mozzarella for another cheese, or even include grilled chicken for added protein.
Can I make this sandwich ahead of time?
Yes! You can prepare all components in advance and assemble just before serving to keep the bread fresh.
Is the Green Goddess Sandwich vegetarian?
Yes! This sandwich is vegetarian-friendly as it includes no meat products.
What can I serve with my Green Goddess Sandwich?
Pair it with fresh fruit, a side salad, or some crunchy chips for a complete meal.
Final Thoughts
The Green Goddess Sandwich is not only vibrant and tasty but also versatile enough for various occasions. With its customizable ingredients and refreshing flavors, it’s perfect for lunch or dinner. Give it a try and explore different vegetable combinations to suit your taste!
Green Goddess Sandwich
Indulge in the vibrant flavors of the Green Goddess Sandwich, a delightful vegetarian meal that combines fresh ingredients and creamy textures for a satisfying experience. This sandwich features a luscious herb sauce made from Greek yogurt and mayonnaise, paired with crisp arugula, creamy avocado, and fresh mozzarella—all packed between hearty slices of whole-wheat bread. Perfect for lunch, picnics, or a quick dinner, this recipe is incredibly versatile and can be customized to suit your taste preferences. With minimal preparation time and an explosion of flavor in every bite, it’s an easy choice for anyone looking to enjoy a nutritious meal.
- Prep Time: 10 minutes
- Cook Time: N/A
- Total Time: 0 hours
- Yield: Serves 2
- Category: Lunch
- Method: No-Cook
- Cuisine: American
Ingredients
- ¼ cup Greek yogurt
- ¼ cup mayonnaise
- 1 clove garlic, grated or pressed
- 3 tablespoons fresh chives, finely chopped
- 3 tablespoons tarragon, finely chopped
- zest and juice of ½ lemon
- 1 tablespoon olive oil
- ¼ teaspoon salt
- ¼ teaspoon ground black pepper
- 4 thick slices whole-wheat bread (1/2 inch)
- 1 cup arugula (or watercress)
- 6 ounces fresh mozzarella cheese, sliced ¼ inch thick
- 1/3 English cucumber, thinly sliced
- 1 medium avocado, sliced
- 2/3 cup alfalfa sprouts
Instructions
- In a mixing bowl, whisk together Greek yogurt, mayonnaise, grated garlic, fresh herbs, lemon juice, olive oil, salt, and pepper until smooth.
- Spread 2 tablespoons of the sauce on each slice of bread.
- On two slices (sauce side up), layer arugula, mozzarella slices, cucumber slices, avocado slices, and alfalfa sprouts.
- Top with the remaining slices of bread (spread side down) to close the sandwiches.
- Cut in half diagonally and serve immediately for optimal freshness.
Nutrition
- Serving Size: 1 sandwich (227g)
- Calories: 480
- Sugar: 4g
- Sodium: 580mg
- Fat: 24g
- Saturated Fat: 6g
- Unsaturated Fat: 16g
- Trans Fat: 0g
- Carbohydrates: 51g
- Fiber: 12g
- Protein: 14g
- Cholesterol: 30mg